First Time using Finsweet

Implementing Filters with Finsweet:
For the last 24 hours, I’ve been trying to implement a filter button on my website’s blog section. It’s been a struggle because Webflow doesn’t have many filter options at the moment. However, I am extremely grateful for all of the CMS features. I figured giving users the ability to filter out blogs based on posts would help them narrow down their search. I figured this would make them more inclined to read the blog if they could find it easier.
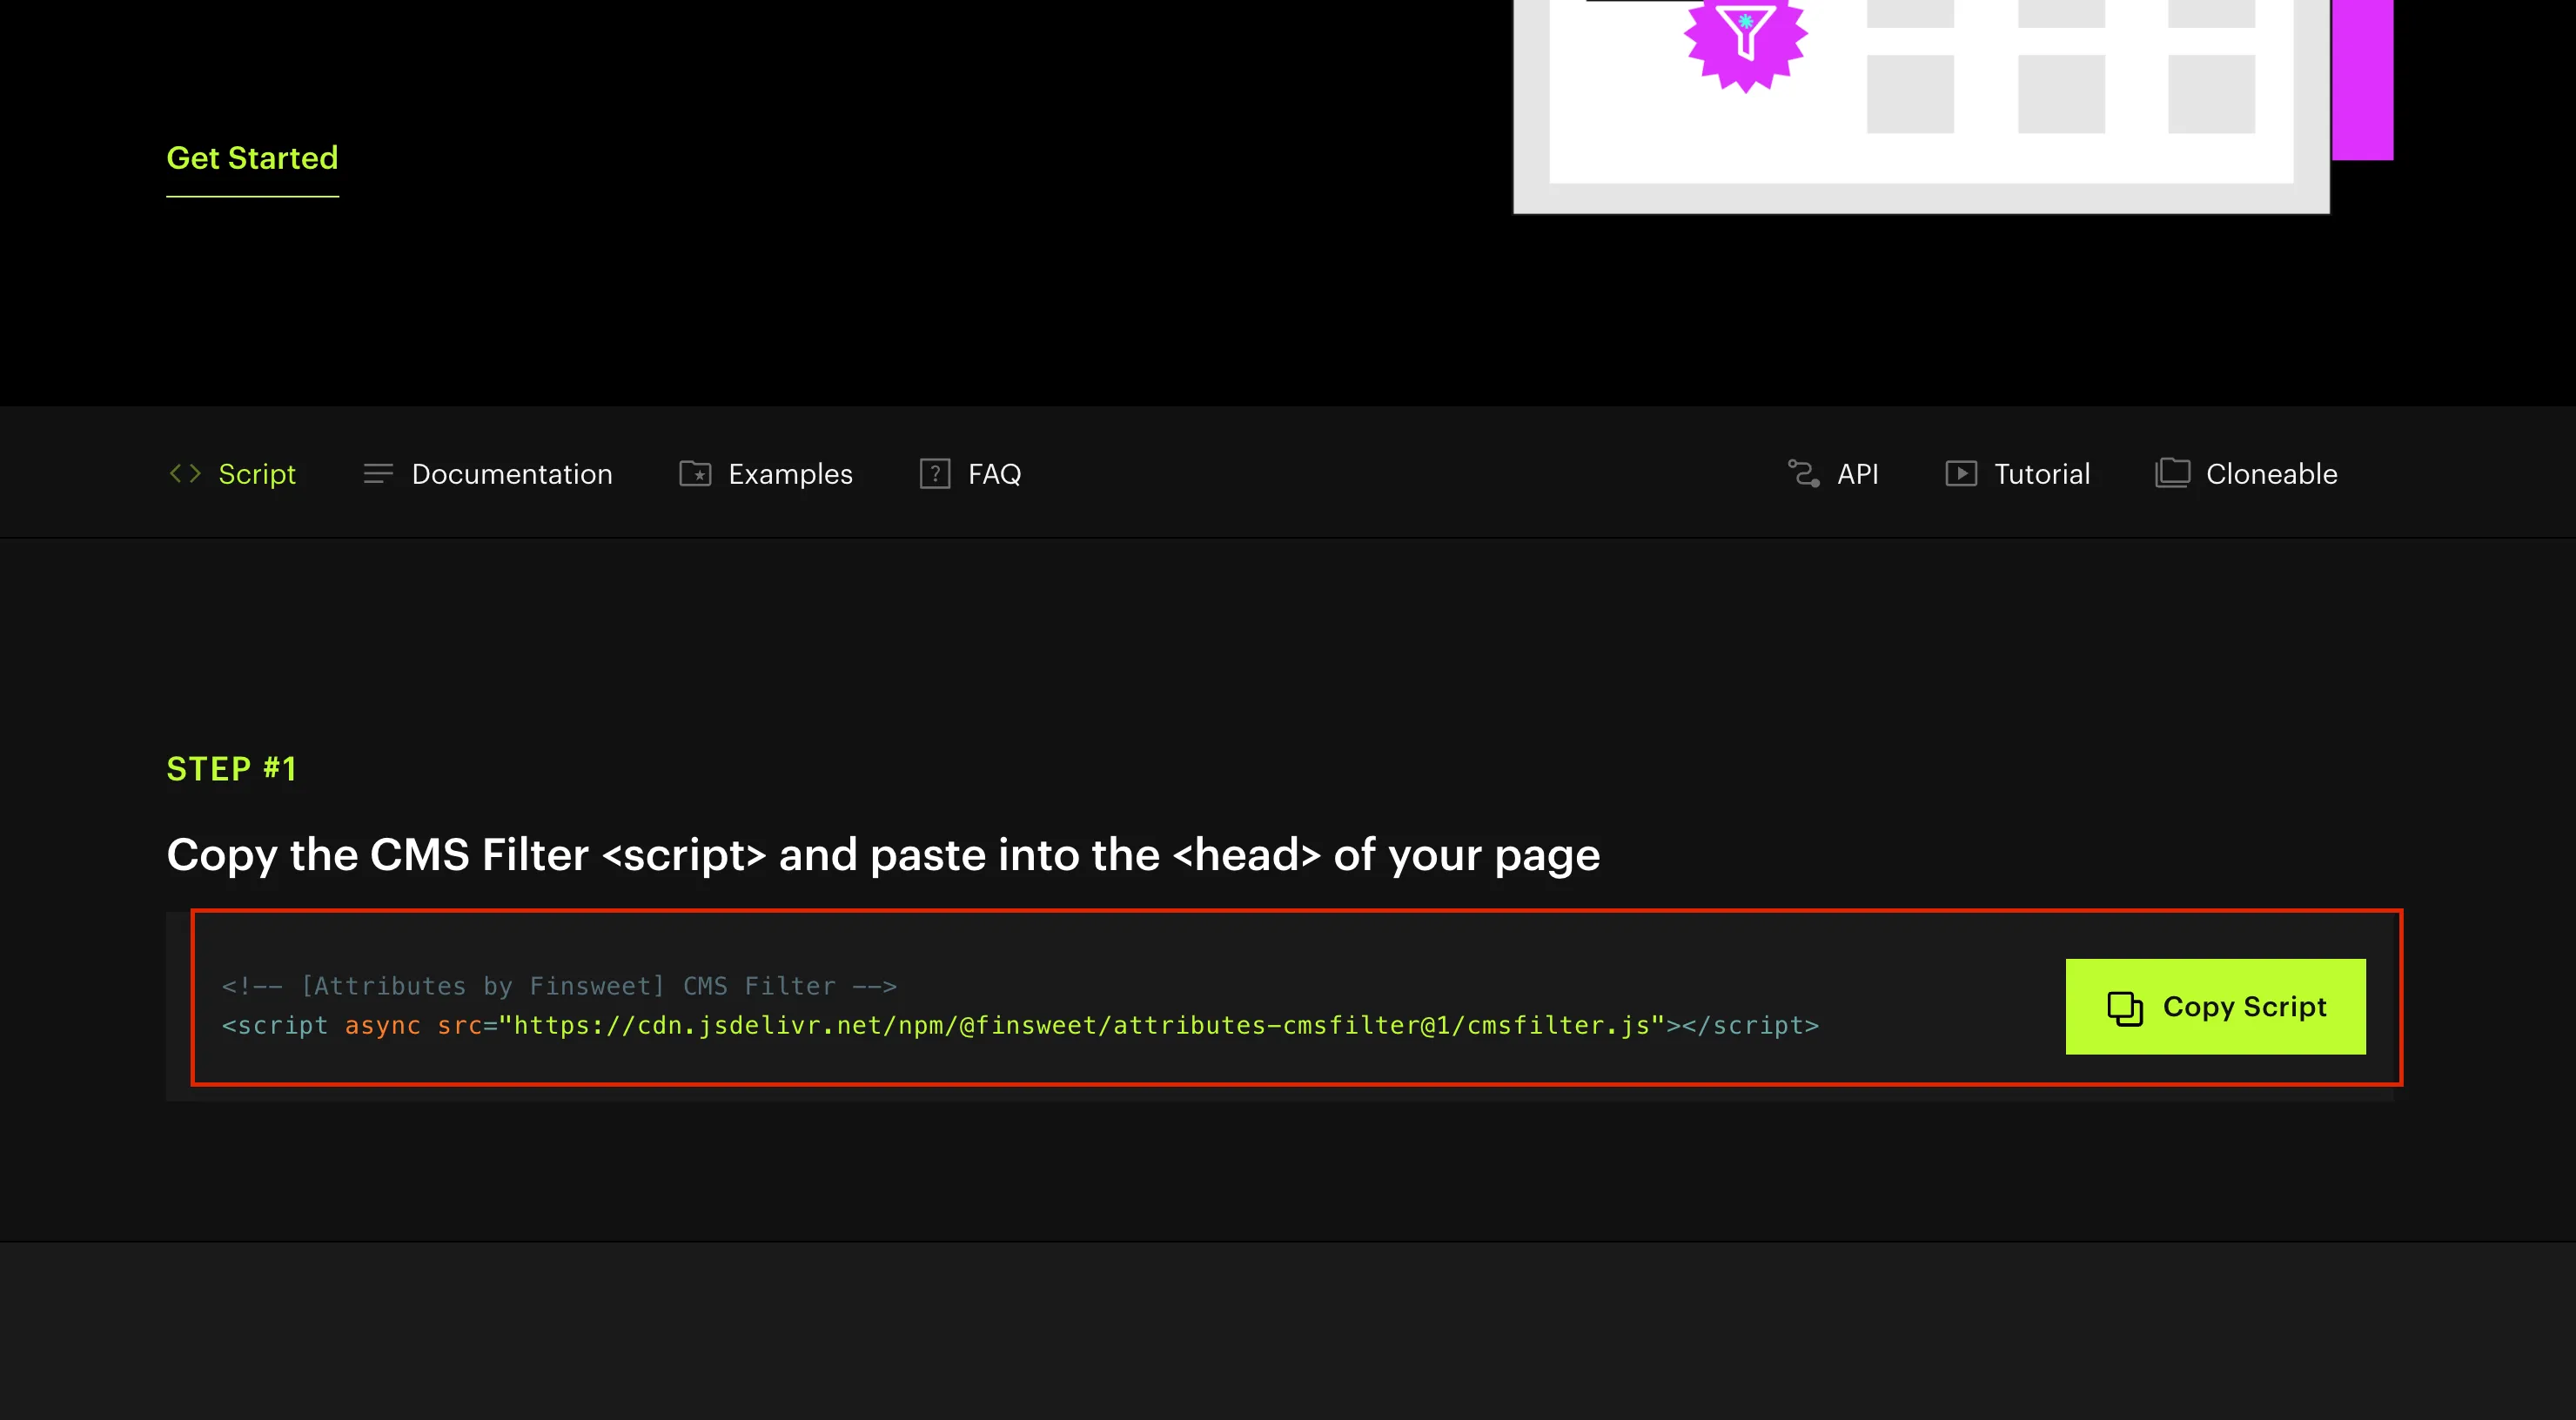
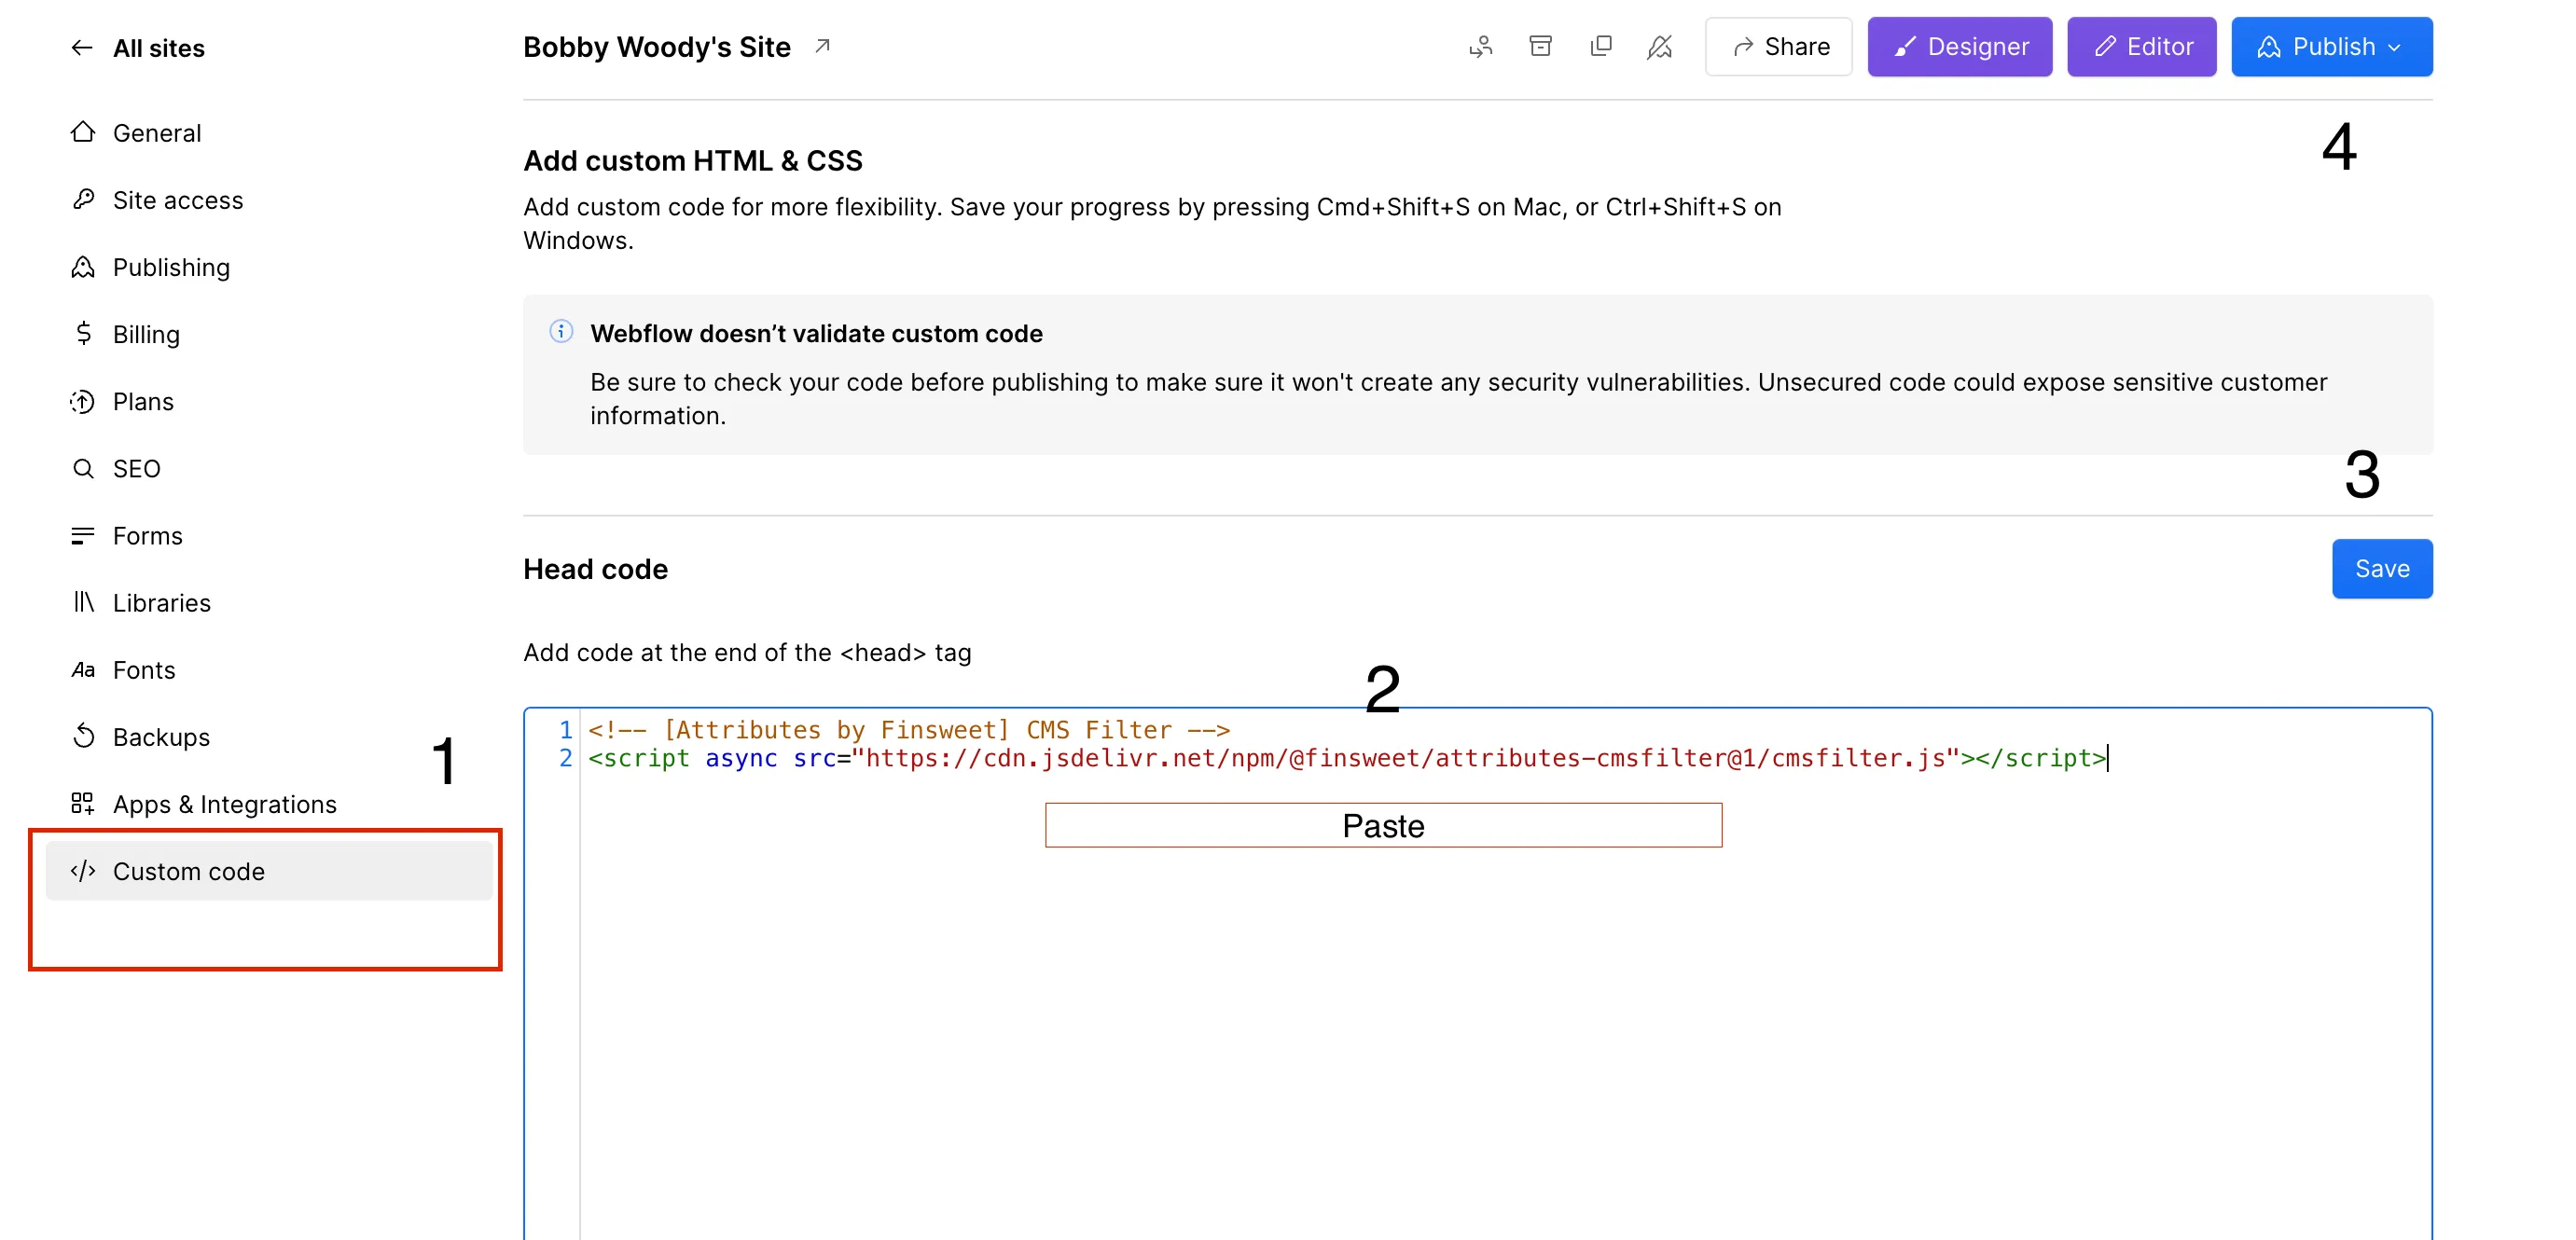
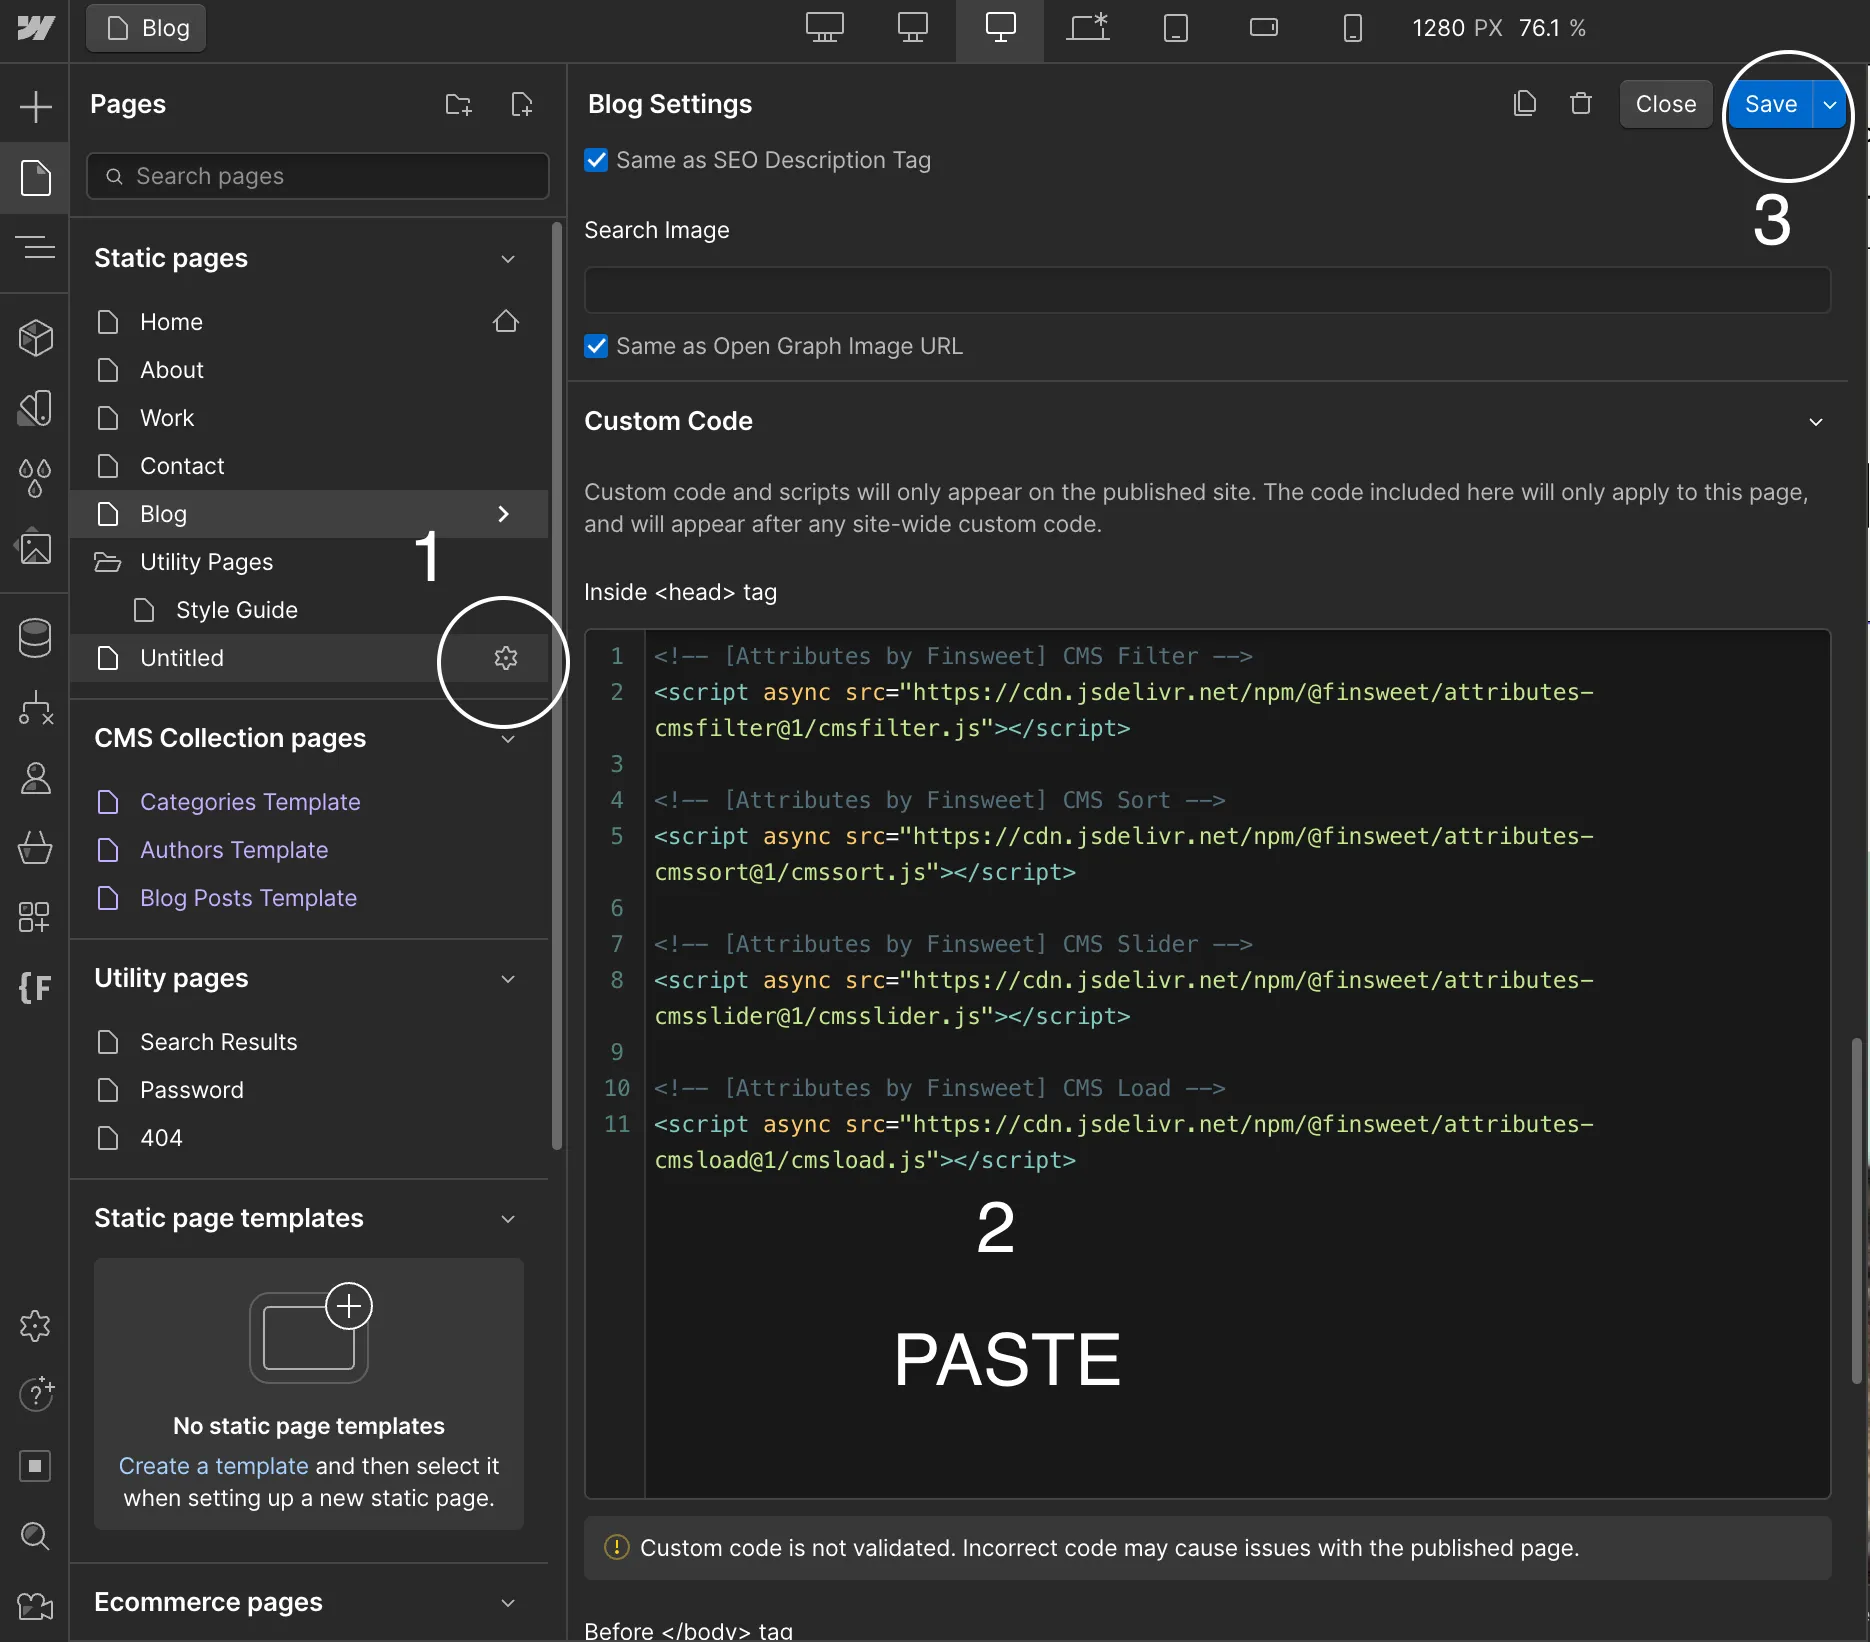
So, I stumbled across Finsweet. They offer additional features to Webflow like filtering, sorting, and share icons. However, the first thing you have to do is go on their site, make sure you get the script, and put it in the head tag of the page where you plan on using the Finsweet features. Or you can put it in the head of all your pages by going into your project settings.
Note: I wouldn’t recommend adding the script to all pages if not necessary, as it will add extra code to pages that aren’t using it.


Next, I highly recommend you watch this video by Finsweet in its entirety because there’s a lot of information. Even if you don’t plan on using all of the filters or sorting options, it will give you a greater understanding of what you can do with filtering. Who knows, it might be the inspiration for your next project.
The process, though it seemed straightforward, was challenging for me because I didn’t take the time to do it the Finsweet way. Finsweet’s documentation is pretty straightforward, but the video tutorial really helped solidify the custom attributes and how to use them. However, it can be overwhelming at first glance. I spent a good amount of time just familiarizing myself with their library and figuring out which parts were relevant for me.
Integrating Finsweet’s filtering functionality required me to adjust my existing Webflow setup. I had to ensure that my CMS collections were properly structured so that the filters would work seamlessly. This involved tweaking my design and occasionally diving back into the Webflow CMS to make sure everything aligned perfectly.
Once I had the basics set up, it was time to customize the filters to fit my blog. I decided to add filters for categories, tags, and summaries to give users multiple ways to refine their search. This part was actually quite fun as it allowed me to get creative with the user search and improve the overall user experience.
After implementing the filters, I had to publish my site because the filter only works on a published site. Remember that code we added to the head of the HTML? Yes, that code does not render in the Webflow preview mode.
Looking back, this experience has been incredibly rewarding. Not only did I enhance the functionality of my blog, but I also learned something new. If you’re considering adding advanced features to your Webflow site, I highly recommend giving Finsweet a try. It might be a bit of a learning curve initially, but the benefits are well worth it. Plus, you’ll gain valuable skills that can help you in various web development scenarios.
So, that’s my journey with Finsweet so far. I’m excited to see how these new features will improve user engagement on my blog. Stay tuned for more updates and feel free to reach out if you have any questions.
